Description
Twenty-plus years of timber framing experience condensed into the shop reference manual you’ll keep beside your workbench for years.
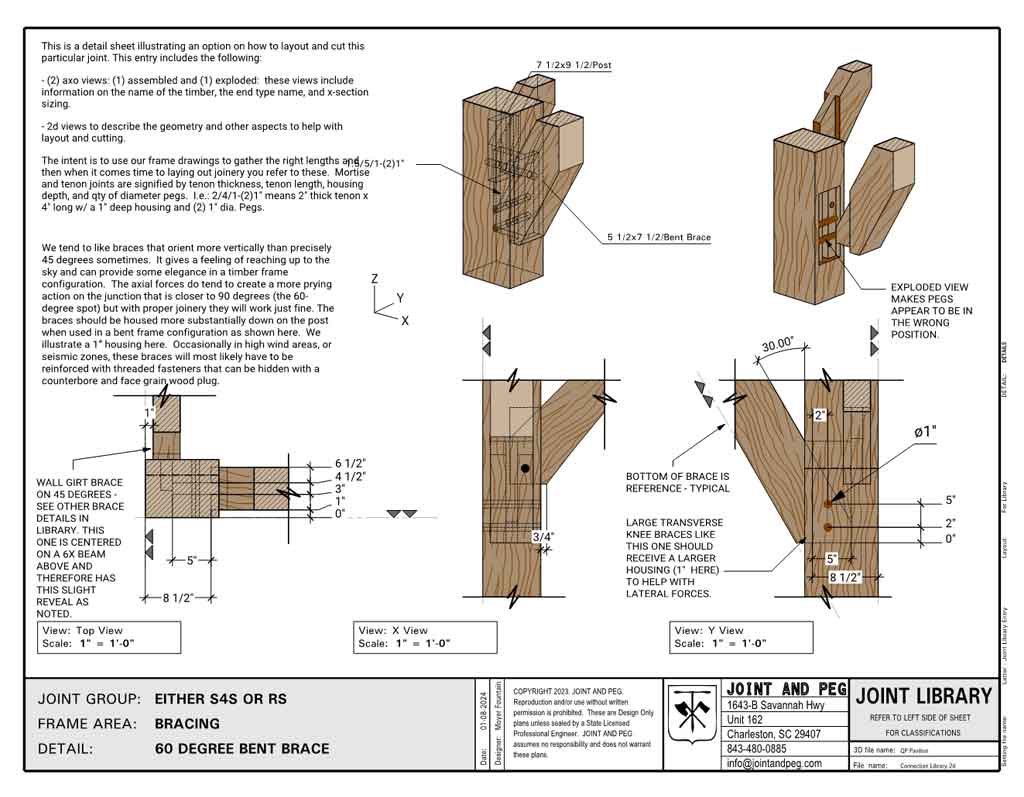
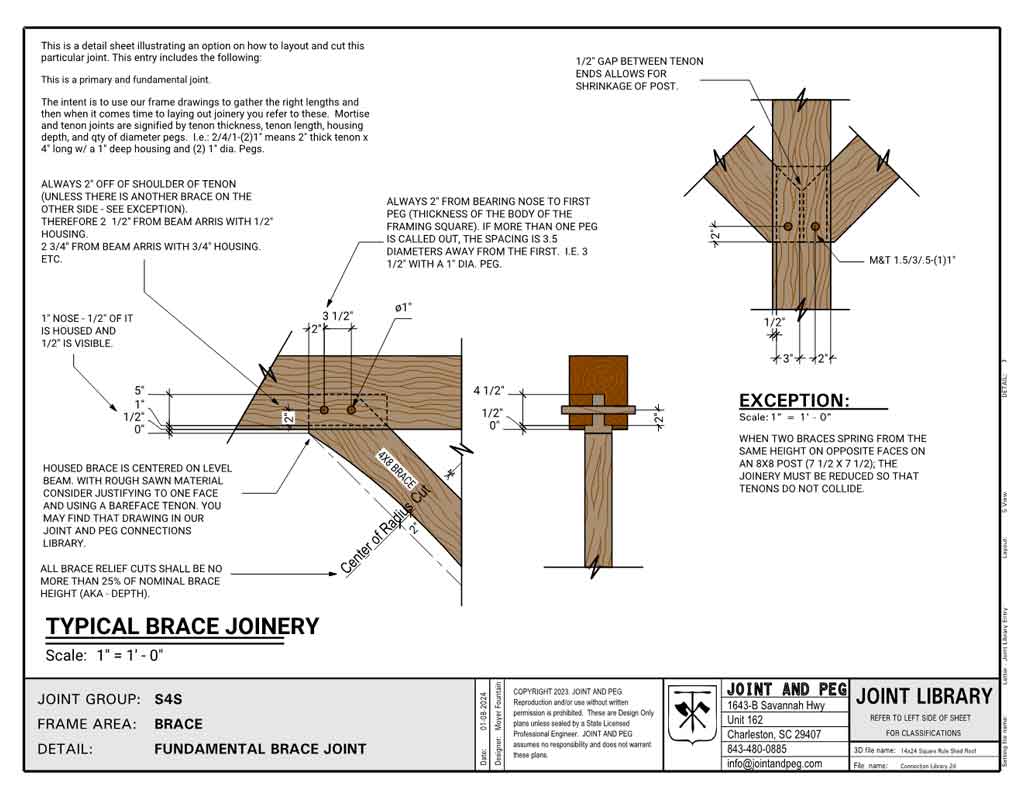
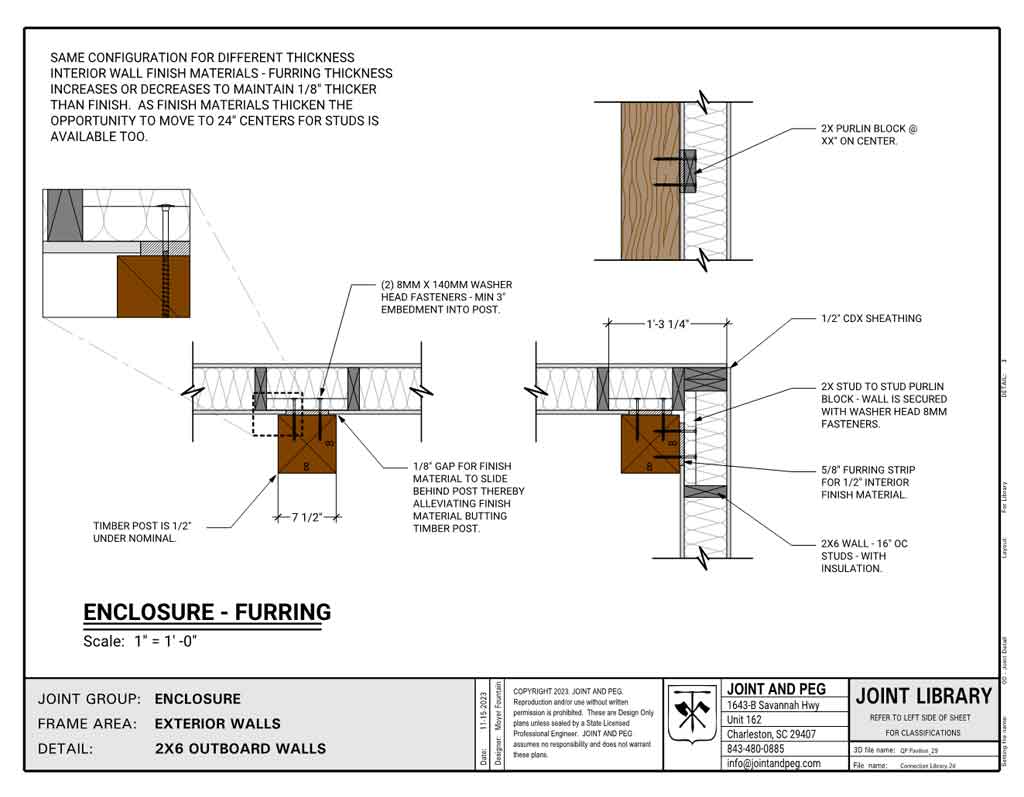
You may print all the drawings from your computer if you like. These joint diagrams are the same as described in our joint library on our website, except you have access to hardcopy files. The drawings have a small paragraph describing the context of the connection. Further information includes notes, callouts, and dimensions on the drawings.
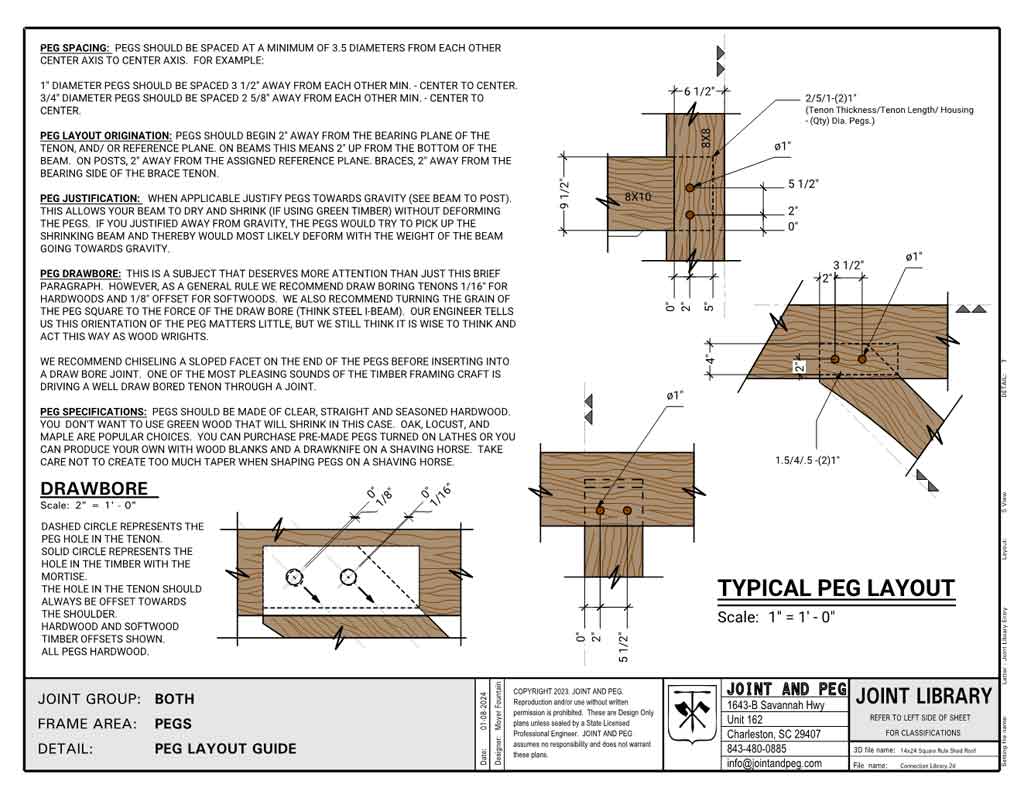
Every drawing explains why the joint is detailed the way it is—not just what to cut. You’ll understand proper relish, housing depths, peg placement, clearances, shrinkage allowances, and traditional timber framing practices.
Build Better Timber Frames with Proven Joinery Details
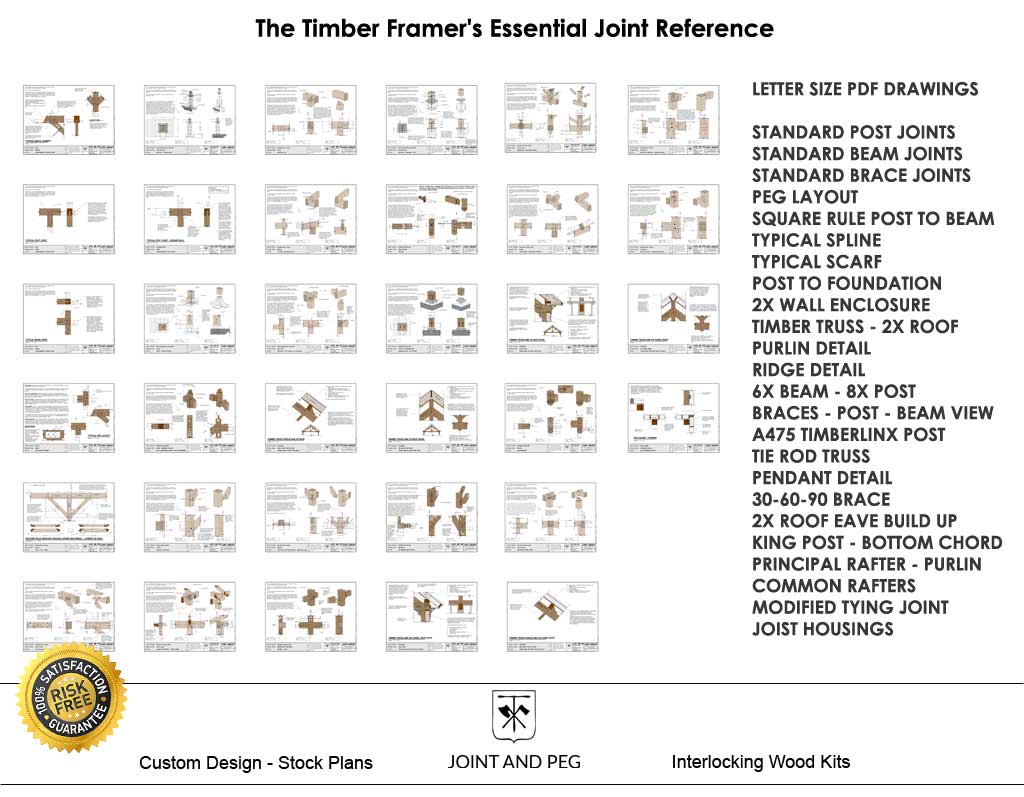
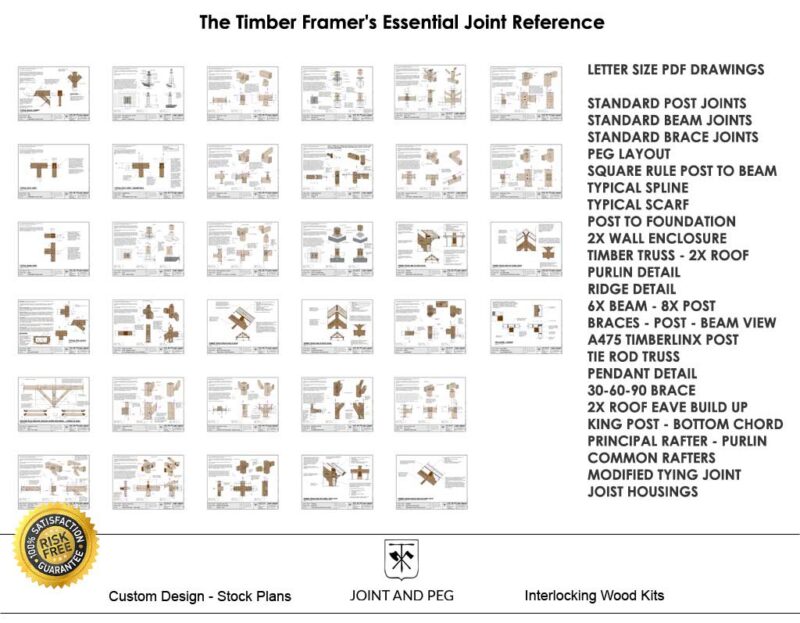
- 34 printable shop drawings
- Traditional mortise & tenon joinery
- Instant PDF download
Perfect for:
- DIY timber framers
- Professional carpenters
- Timber frame designers
- Students
- Woodworking schools
- Builders transitioning from conventional framing
After working through this catalog you’ll understand:
- Proper tenon sizing
- Peg spacing
- Drawboring concepts
- Housing depths
- Timber reductions
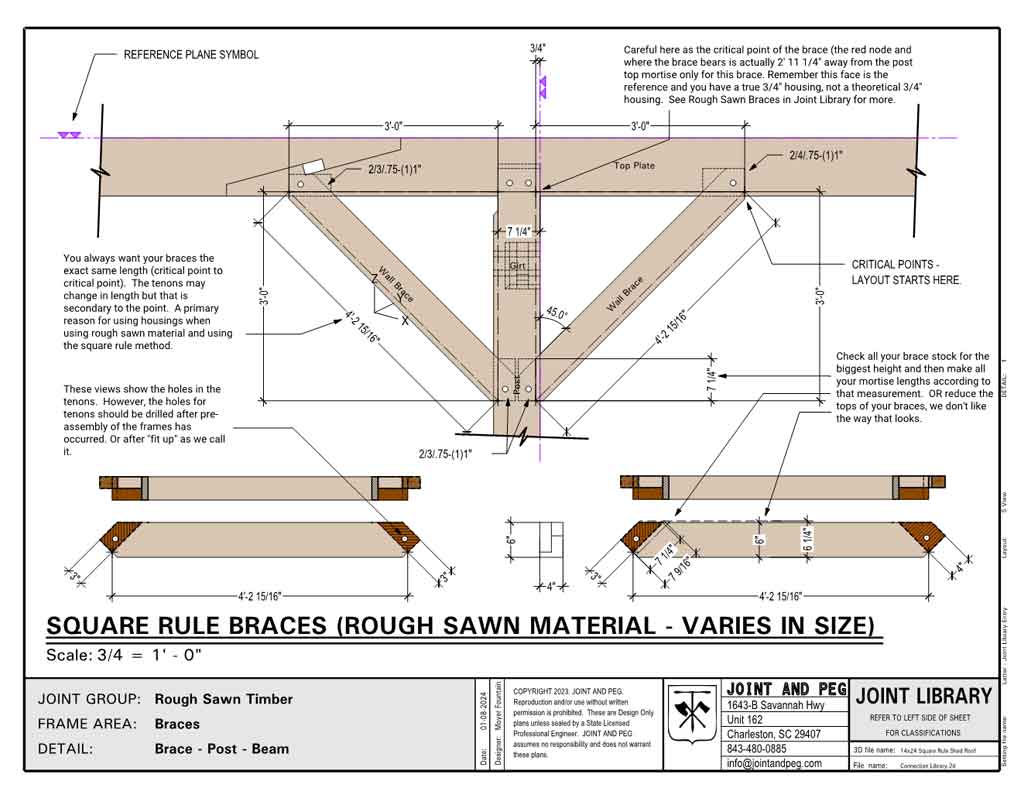
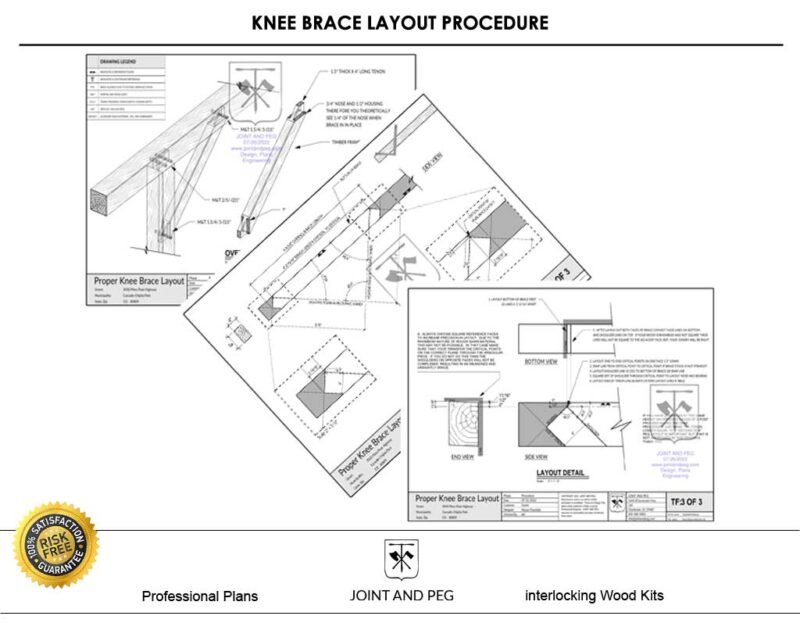
- Brace geometry
- Foundation connections
- Roof framing details
- Square Rule joinery
Timber frame joint details.
- Post to Foundation Options
- Standard Post Joint Diagrams
- Standard Beam Joints
- Standard Brace Joints
- Peg Layout Standards
- Square Rule Posts with Reductions and Instruction for Square Rule
- 2x Wall Enclosure Section
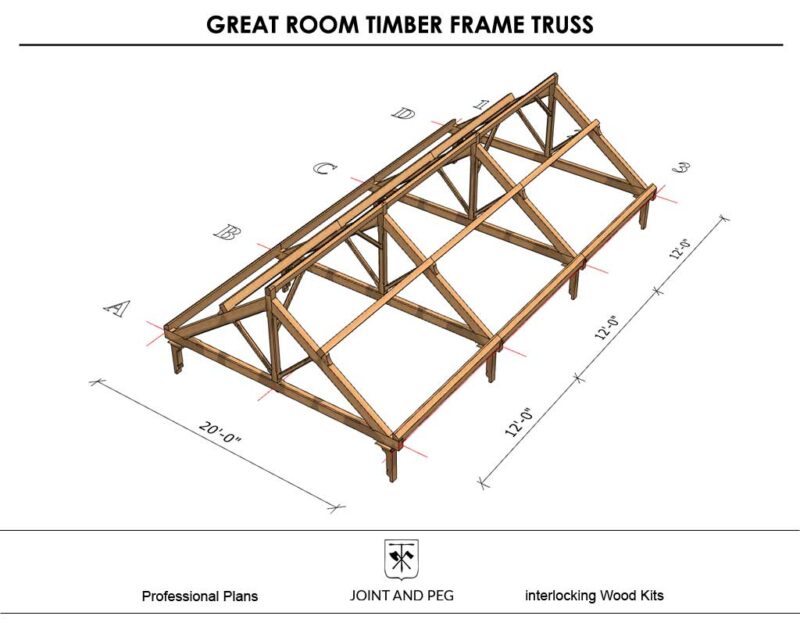
- Timber Trusses with 2x Roofs
- Purlin Details
- Ridge Scenarios with Trusses
- A475 Post Connections
- 2x Roof Eave Cornice Build Up
- Common Rafters
- Modified Tying Joints
- Housed Purlins and Joists
Every detail comes from actual timber frame construction and reflects the methods we use when designing and building timber structures.
An example of the write of one entry:
Typical Post Joint
Post top tenons should have a long tenon as roof load uplift is usually a factor. 3″ of relish (beyond the pegs to the end of the tenon) and 2″ of distance from the pegs to the shoulder. With surfaced material there is no need to house the joint. We do not recommend creating 4 shoulders at this joint, or any for that matter, unless a cnc machine is cutting the joint.
Over plunge the mortise to allow for clearance of the radial cut from a chain mortiser (crosscut tooling shown) and/or to account for shrinkage of the wood.
Referenced by DIY builders, architects, and professional timber framers.
Planning vs. Construction
Project Planning Package
The Project Planning Package is designed for the early stages of a project, when you are evaluating the design, developing costs, coordinating the project, and deciding how you want to proceed.
It is useful for:
- Evaluating whether the design is right for your project
- Developing preliminary pricing and budgets
- Working with builders, contractors, architects, or engineers
- Coordinating the design with your site
- Working through permitting or approval requirements
- Deciding whether to move forward with construction
* All Planning Package purchases will receive a 100% credit coupon towards the Construction Package plan purchase.
Project Construction Package
The Project Construction Package is designed for customers who are ready to move from planning to fabrication and construction.
It provides detailed timber-frame documentation needed to fabricate and assemble the frame, including construction drawings, timber member information, joinery details, and shop drawing information.
It is useful for:
- Fabricating the timber frame
- Preparing timbers for layout and cutting
- Understanding individual members and their connections
- Planning frame assembly
- Providing detailed information to builders and timber framers
In Simple Terms
Planning = Understand, price, coordinate, and prepare.
Construction = Fabricate and build.
Which Package Is Right for Me?
Choose the Project Planning Package if you are:
- Still evaluating the project
- Developing preliminary costs
- Getting bids or discussing the project with builders
- Working through permitting or site considerations
- Deciding whether to proceed with construction
Choose the Project Construction Package if you are:
- Ready to fabricate or build the timber frame
- Preparing to order or cut timbers
- A builder or timber framer who needs detailed construction information
- Ready to work from detailed joinery and shop drawings
Some designs are offered only as Construction Packages. If no Planning Package option is shown on this product page, this product is the Construction Package.
30 Day Guarantee
Joint and Peg is committed to satisfying our customers with a quality product and service. We will provide refund for this Timber Frame Joint Details Catalog under the following conditions:
- Full refunds on downloaded plans within 30 days of purchase minus a $10 processing fee.
- Full refunds on shipped plans within 30 days of purchase minus a $10 processing fee + the shipping and handling fee.
- We request that you fill out a brief questionnaire to better understand your dissatisfaction and/or reason for the return. This is optional for you, but we would appreciate your reasons for the refund request.
- Engineered Construction Plans sales are final.
After 30 days, all plan sales are final. Please be sure that you have chosen the best plan to suit your needs and have received answers to your questions before making the purchase.
You can call us so we can assist with basic questions, and we are here Monday-Friday, 9-5EST to speak with you.
You can also email us at info@jointandpeg.com
Reviews
There are no reviews yet.