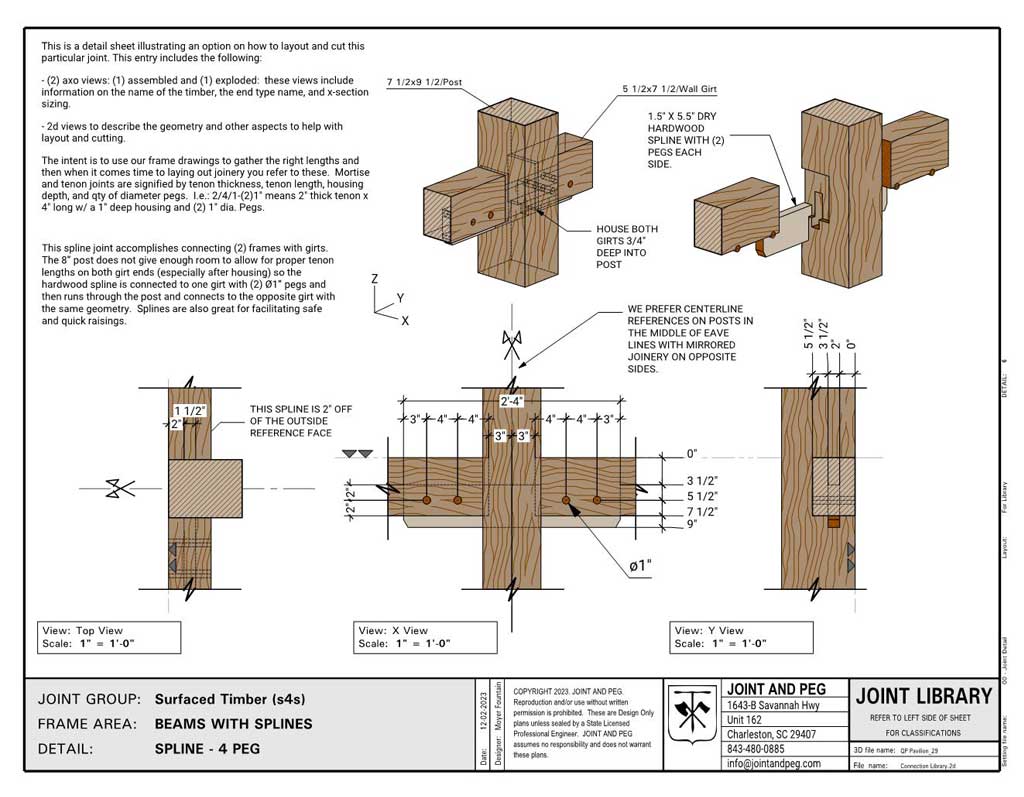
Scarfs and Spline joints are two different ways of creating end of beam to end of beam connections.
A scarf joint is when (2) beams are joined end to end to create one long beam from two short ones. Scarf joints can be either joined with sloping interfaces or just square cuts. Some are stronger than others. There are some general rules that should be followed with scarf joints which we illustrate in the details that follow.
A spline is a separate piece of wood (typically dried hardwood like oak) that allows you to connect (2) adjacent beams in the same axis at a post. The reason you would use a spline instead of (2) tenons at the end of the beams is because the post where the meet does not have enough width to allow for two tenon that are of proper length for pegs. Therefore, you use the free tenon, or spline, as it is called to create the connection. The details that follow clarify the spline joint much better than words.
Table of contents
Scarf Joints
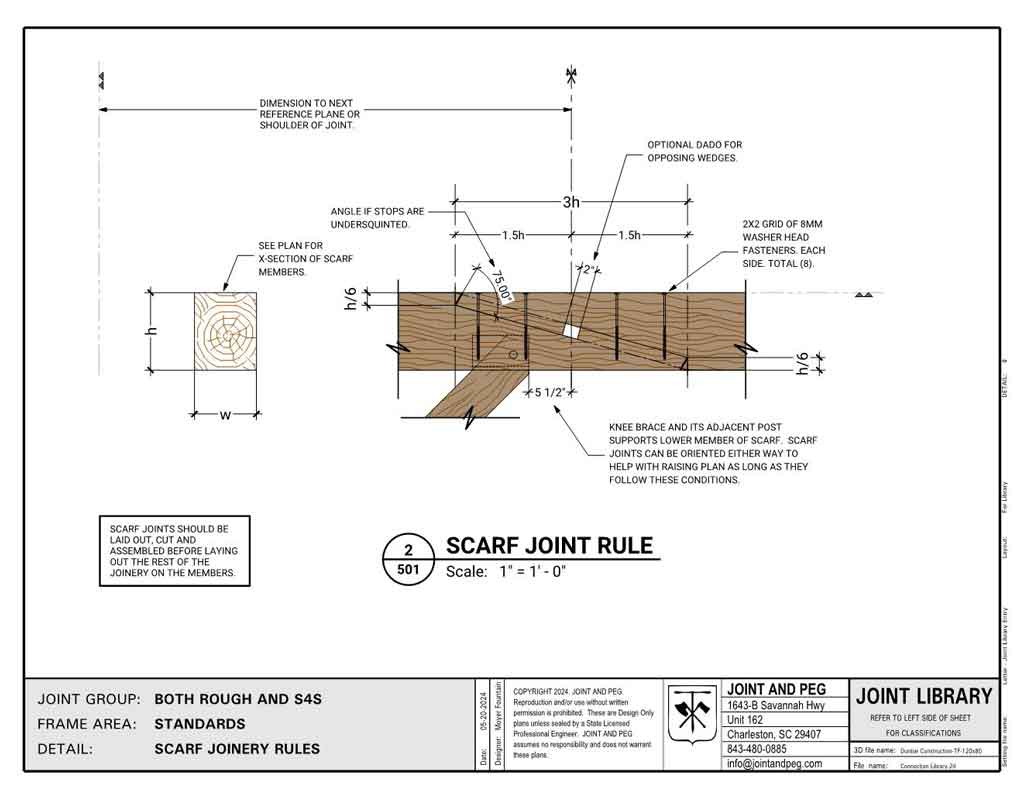
The Standard Scarf Joint
See here what we recommend when approaching scarf joints in timber frame construction. As you can see we have specified the geometry of the scarf joint and how to lay it out based upon the cross section dimensions. Proportional details make us cheerful.
Those ratios are as follows:
- The length of your scarf is 3 times the height (or depth if you are an engineer) of the members.
- The height of the abutments and the end of the scarfs is the height divided by 6. You may round up to a 16th or 8th here for easier layout.
- The width of the member comes into play on more complicated scarfs.
Joint and Peg likes to put the centerline of our scarf joint 5 ½” away from the bearing of a knee brace that springs from the closest post. This allows for the tenon on the brace to not impede into the upper table of the scarf and when followed creates nice order for your construction approach.
When we produce wall frame drawings, or other timber configurations on plans with scarf joints we will use this centerline and the next reference plane as the points to dimension to.
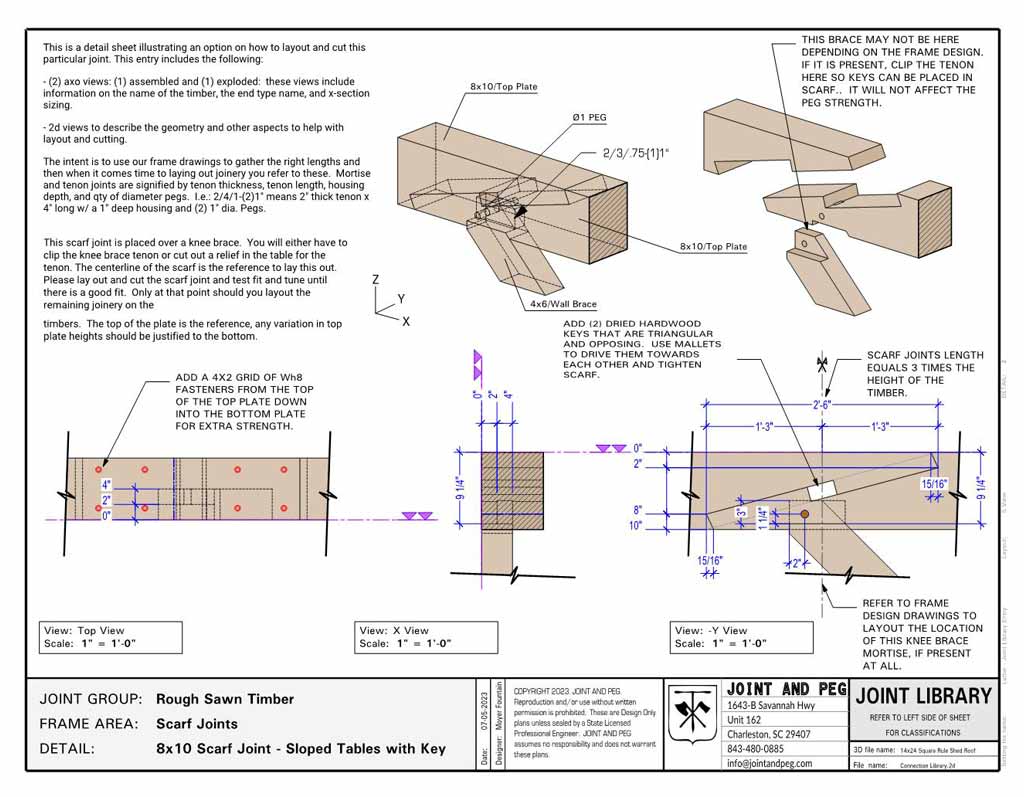
Rough Sawn – Scarf Joint – 8×10 Beams with Keys
This scarf joint is placed over a knee brace. You will either have to clip the knee brace tenon or cut out a relief in the table for the tenon. The centerline of the scarf is the reference to lay this out. Please lay out and cut the scarf joint and test fit and tune until there is a good fit. Only at that point should you layout the remaining joinery on the timbers. The top of the plate is the reference, any variation in top plate heights should be justified to the bottom.
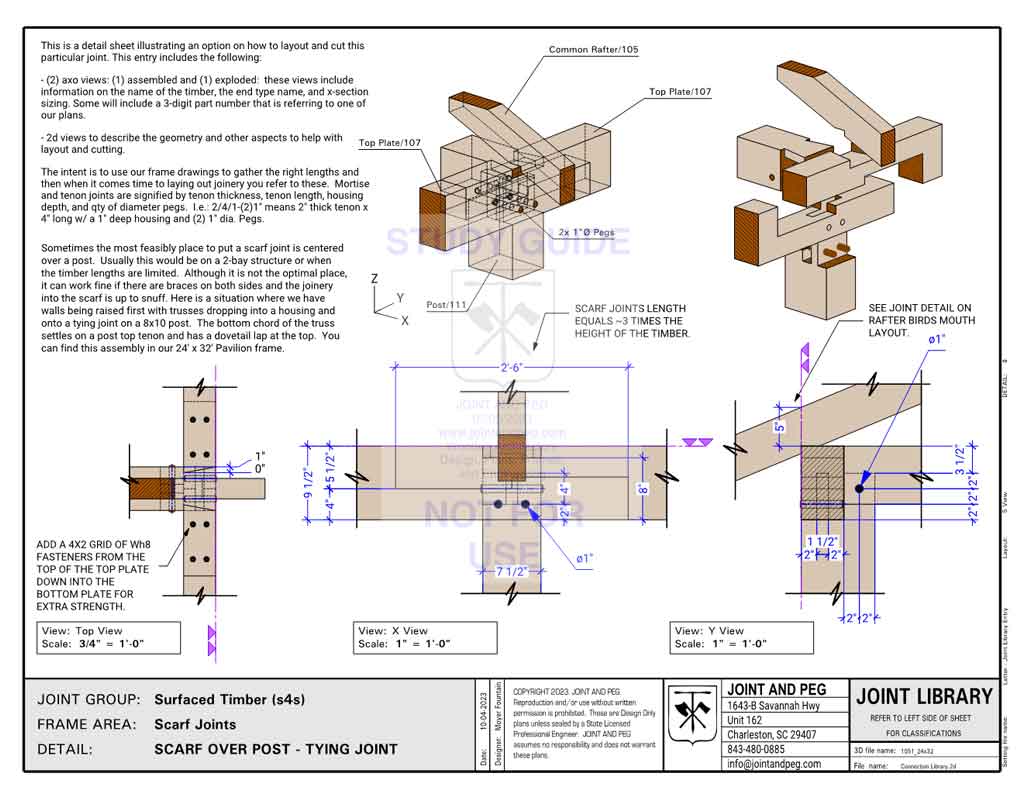
Scarf Joint over a Post – Tying Joint
When your timber isn’t long enough, centering a scarf joint over a post can be a feasible condition. Although it is not the optimal place, it can work fine if there are braces on both sides and the joinery into the scarf is up to snuff. In this scenario the wall assemblies are raised first and then the truss is dropped into its housing. The bottom chord of the truss settles on a post top tenon and has a dovetail lap at the top. You can find this assembly in our 24’ x 32’ Pavilion frame.
Timber Frame Joint Details Catalog
Timber frame joint details on (34) individual letter size sheets. All drawings are printable and delivered instantly through a download link. Joint and Peg entries – Volume 1.
Hardwood Spline Joint – 30″ Long
This spline joint accomplishes connecting (2) frames with girts. The 8” post does not give enough room to allow for proper tenon lengths on both girt ends (especially after housing) so the hardwood spline is connected to one girt with (2) Ø1” pegs and then runs through the post and connects to the opposite girt with the same geometry. Splines are also great for facilitating safe and quick raisings.
