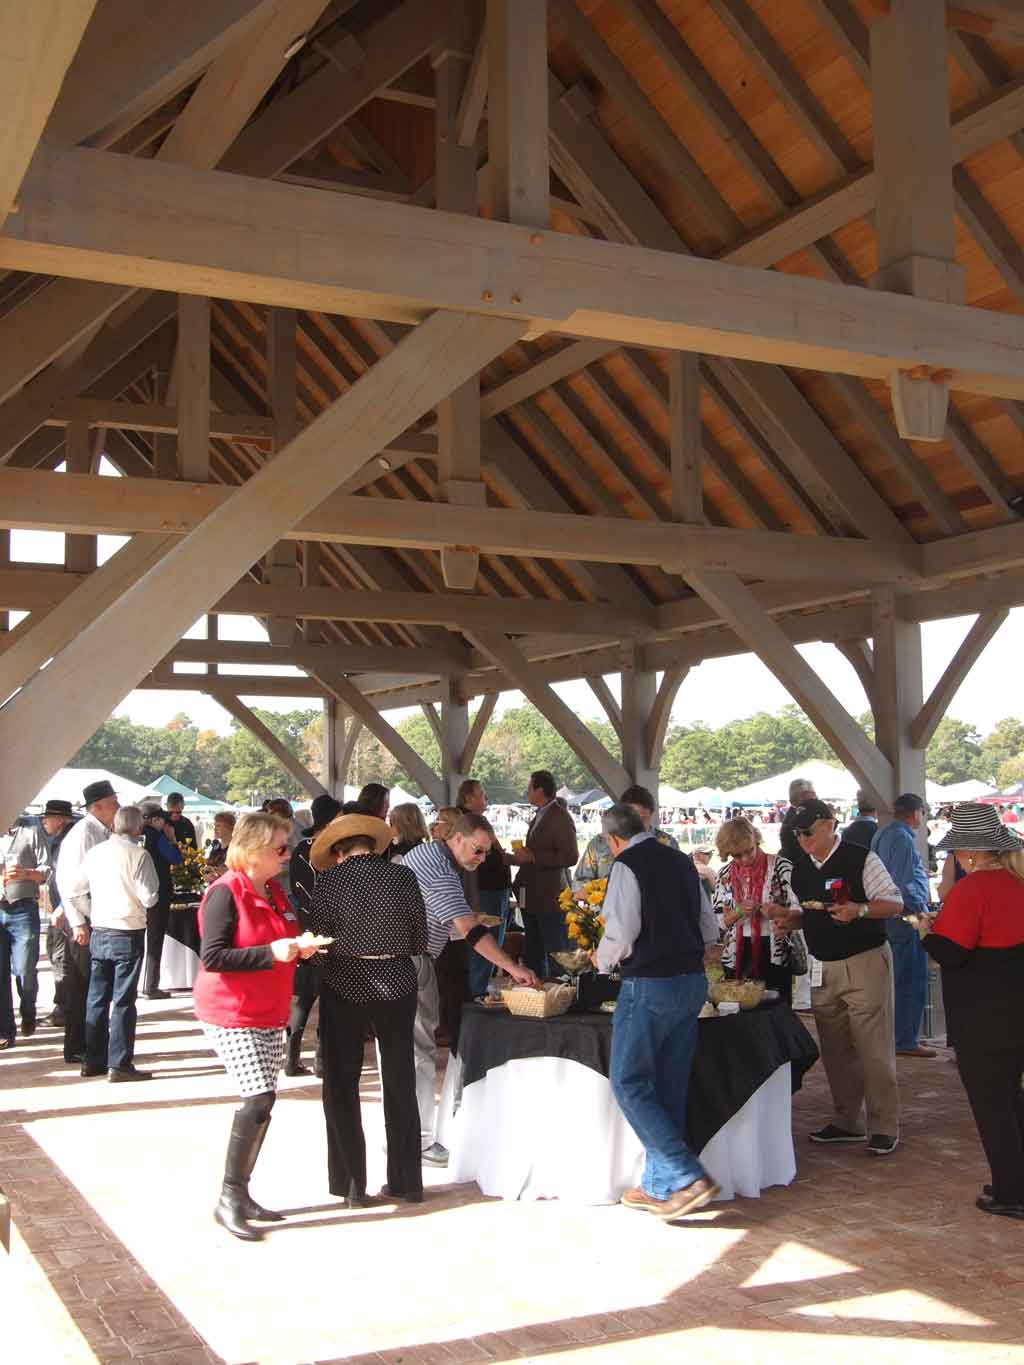
Timber frame pavilions and other open-air structures are remarkable pieces of architecture when done well. Although they make wonderful homes in the right climates, they particularly stand out as gazebos and other open-air structures including wedding pavilions, beer gardens, and farmer’s market shelters to name a few. When you build a timber frame pavilion there is no extra framing that goes into it as it would with an enclosed frame. It’s just the beautiful bones of an honest structure that truly relies on knee braces to keep it standing true.
If you are considering designing a pavilion, carport, or other open shed there are some things you need to keep in mind to create a building that is both beautiful, timeless, and resilient.
In this article you will find out what we have learned through our experience of designing and building timber pavilions. The pictures and designs you see on this page are the work of our founder, Moyer Fountain.
We hope this article helps you with your project. Please contact us if you are interested in learning more about our design and fabrication services. Our plan library is a good starting point. We also have a general timber frame project guide that can be helpful and is an ongoing work!
Choosing the right size pavilion
Sometimes also called the height, scale, and mass of a building, the size of a structure is usually governed by the function you want it to serve with also considering whether the size will make it a harmonious element in the existing site. Typically, you will want the size of your timber frame structure to be secondary to the main building on site. This goes for when the pavilion might serve as a carport, pool house, or the accessory structure to a main residence. If the timber pavilion is the only structure, then it can take a more prominent role.
For example, we have a 16×24 Timber Frame Pavilion that is longer than it is wide that would fit a more slender job site and we have our 24×16 pavilion that is only four posts and has a much more commanding gable presence. It’s all a matter of taste and what would fit will with your site. You could also choose a 3 Gable Pavilion when you have a corner of your property that you want to add a nice outdoor entertaining area.
Roof styles of timber frame pavilions
There are many different roof styles, but the two standards are the gable and hipped roof. The gable roof has two roof planes, with two eaves and two rakes on the ends. The hipped roof has four roof planes, and four eaves. We will discuss the benefits and potential drawbacks of both styles.
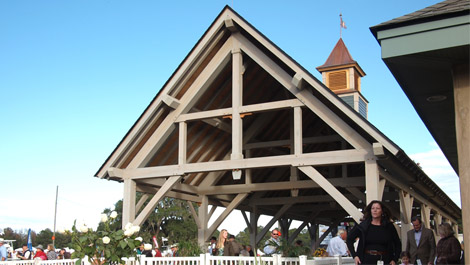
Gabled Roofs
Built Project – Hollywood, SC
This pavilion was designed and built by our founder Moyer Fountain. All pictures on this website are of our work and we can provide the same for you.
The gable roof is the roof shape that most think of when they imagine a roof. Its benefits are that it is simple and allows any timber work in the roof to be visible from the ends. Its simplicity also translates to the construction work as well as it is much easier to layout and cut a gable roof as opposed to a hip roof. The one potential drawback of the gable roof is that if you are in a windy and rainy environment the open ends reduce the protected area from the elements. For this reason, it is always wise to have deep rake overhangs on a gable pavilion.

16×24 Timber Frame Pavilion Plan
A classic mid-size timber frame. There are many possible functions for this structure including a carport, pavilion, pool house, and arbor. True mortise and tenon joinery.
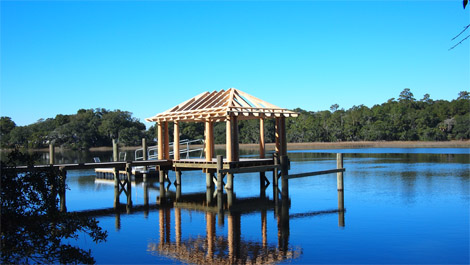
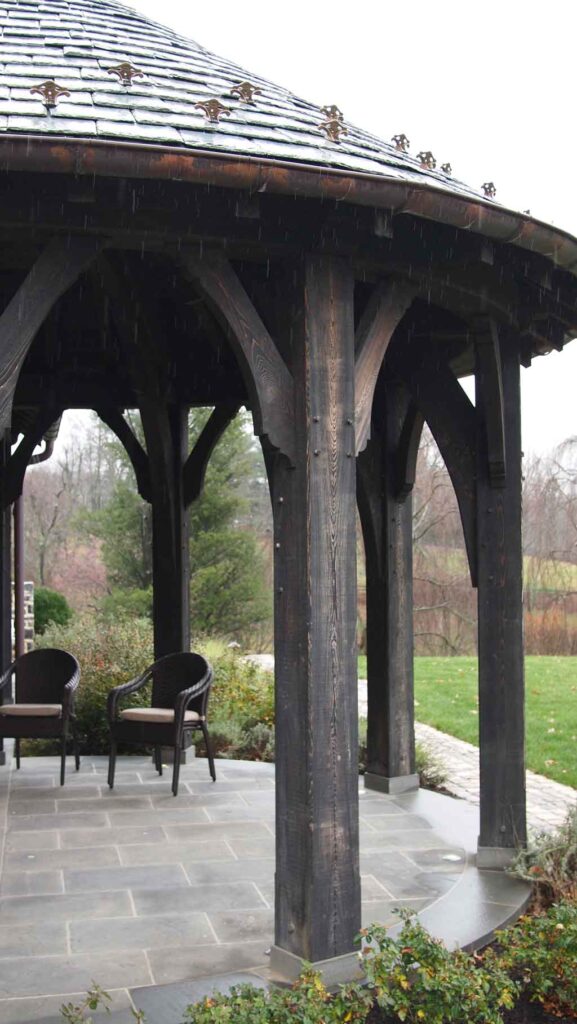
Hipped Roofs
Built Project – Lowcountry, SC
Moyer Fountain designed and built this dock house along with RGA Architects. All pictures on this website are of our work and we can provide the same for you.
Hipped Roofs can really provide more protection underneath them in open air pavilion structures. This is really a big plus when you might have a table or seating arrangement underneath. It’s unfortunate during a rainstorm to have the precipitation come in to your seating area which is more likely under a gable roof. On a hip roof, the actual roof finish can take a more prominent role in a hipped roof (although a quality roof finish is always nice with any style).
16×30 Timber Frame Pool House Plan
It really is a great benefit to have a hipped roof structure for open air architecture. This 16×30 timber frame pool house area is designed to beat back the elements.
Protecting the structure from the elements
Open air structures when designed and built correctly can last indefinitely. As with most buildings, water is the enemy and proper design aspects can help protect the timber or wood frame from the elements. We will discuss two key points in creating favorable conditions so your investment can last.
Deep Overhangs on Roof
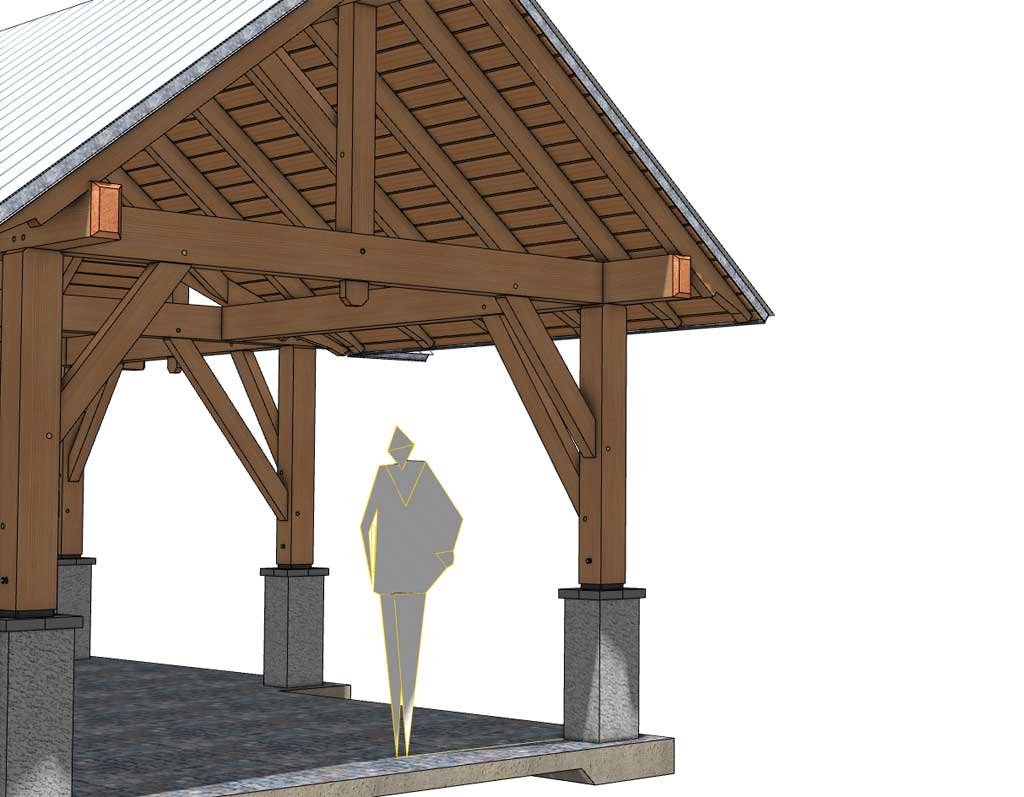
With any open-air structure, we think it makes sense to have deep overhangs to better protect the structure and its furnishings from both sun and rain. With most timber pavilions you would most likely have either 4x or 6x rafters. Given that they are wider than your typical 2x lumber rafter, the overhangs actually look shorter. We don’t usually have an overhang less than 1’6” on our open-air timber structures. Depending on the pitch of the roof we usually design with 2’ 0” overhangs and sometimes use even deeper overhangs. We try to balance the visual appeal with the function of protecting from rain and sun. Our taste tends to favor deeper overhangs at any rate. Protection from deep overhangs will add to the longevity of your pavilion, pool house, carport, or other heavy timber structure.
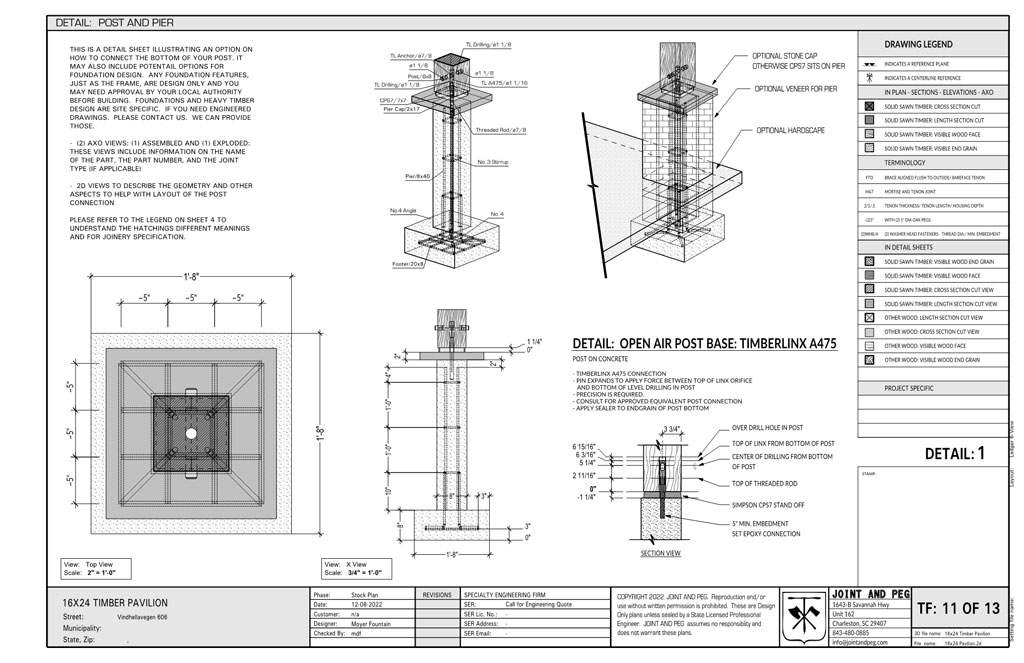
Protecting timber frame pavilion post feet
Install a barrier between masonry and wood
Another important aspect of promoting longevity of your timber frame pavilion is to protect the post feet. At a very minimum you always want to have a 1” thick barrier between the bottom of your post and any masonry or concrete. This minimum is not only dictated by the International Building Code but is also a prudent approach. The barrier should be an impermeable material that does not allow water transmission.
There are products you can buy from building suppliers such as Simpson and its cp7 product. You can also use a custom material such as HDPE (High Density Polyethylene) or in other words, tough plastic. This barrier should be smaller in plan dimensions than your post. For example, if you have an 8×8 post that is actually 7.5 x 7.5 you will want to use a barrier that measure 7×7. This ¼” reveal allows any water that lands on your post to drip off the bottom corner of the post instead of being caught by the barrier.
It’s very important that you do not create a shelf with the barrier that catches water. This would defeat its purpose. This arrangement should provide you many decades of service life. Even so, if you bring the bottom of the post up higher and sit it on top of a plinth, or base, it will create a situation where the bottom of the post gets wet even less frequently.
Timber Post Plinth
When you place your timber post on top of a masonry plinth you not only provide visual support for the post, but you also reduce even further the post getting wet from precipitation. Our frames and designs here at Joint and Peg, usually call out for a grout filled CMU plinth (with vertical reinforcement), or a form filled concrete plinth. In either instance you can stucco, veneer, or in the case of concrete, leave as is for the finish. You will want to employ the same barrier described in the previous topic between the post and plinth.
Protecting knee brace joinery
The other area that needs attention in creating the longest service life of your timber frame pavilion is the joinery where the lower end of a knee brace meets the timber post. The best way to protect this is make sure your overhang is deep enough where it protects this joinery from rain. Its OK if wood gets wet, but it must be able to dry. When you have a mortise and tenon joint it creates a cavity. If the mortise gets wet it does not dry very easily so every attempt should be made to keep this area dry. Deep overhangs are valuable once again with this in mind.
Apply a quality roof!
Last but not least is apply a good finish roof for your timber structure. Although architectural shingle has its place, in our opinion, it is not on a timber frame pavilion or pool house! Choose a quality roof deck such as 2x tongue and groove roof decking. Then apply a nice metal 5v or standing seam roof. The sound of the rain on a metal roof is a pleasing sound to enjoy underneath your structure!
If you take these considerations in mind with your project, you will create a pleasing and relaxing area that will last a lifetime.

18×20 Dogleg Frame
This 18×20 dogleg frame is a unique structure for your backyard, garden, or field. Measured at the posts it is 18’ wide x 20’ long. Joint and Peg currently offers a plan package including wood lists, core plan views, elevations, and single beam shop drawings.