Timber Frame post connections have many different types of details on their bottoms and tops. They can interface with concrete foundations, piers, and wood decks to name just a few. There are many different types of conditions and special circumstances here that require attention. We have also included post top timber frame joinery details too.
Table of contents
Post to Foundation
Timberlinx Post Layout
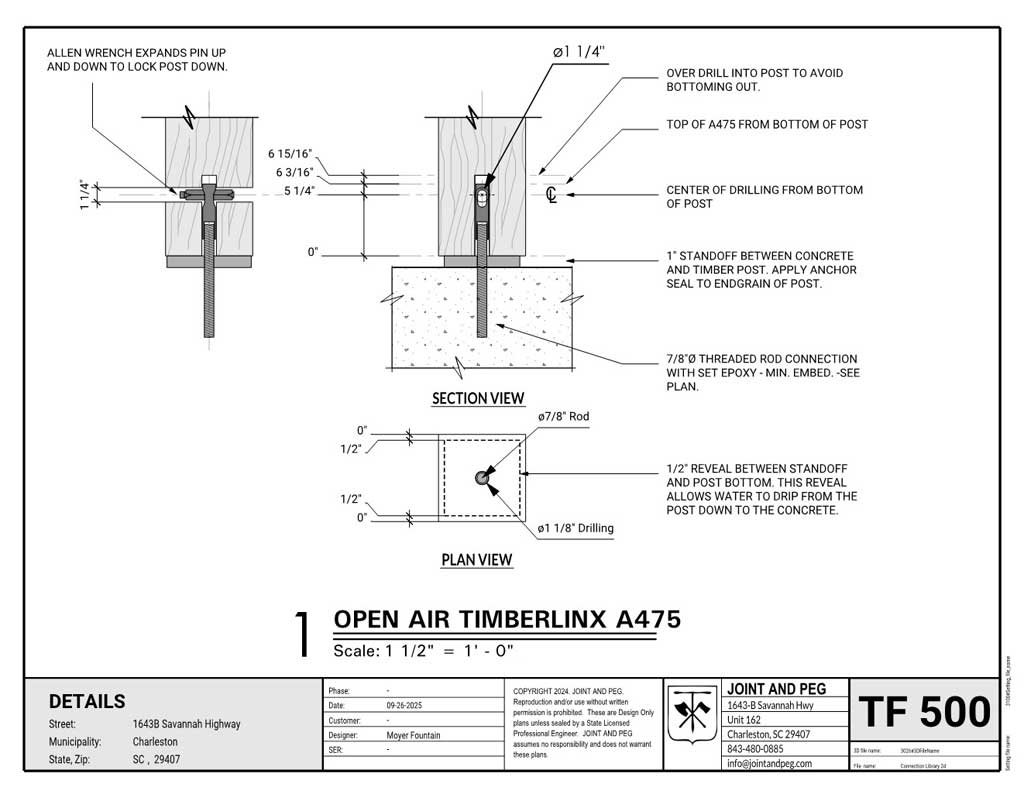
A popular timber post to concrete foundation is the Timberlinx A475. The connection is a good one for keeping the hardware concealed. You do need to make sure you layout the bottom of the post correctly to have the connector work appropriately. Notice in the detail that it should be a minimum of 5 ¼” from the bottom of the post to the pin of the connector. This pin expands. It only works correctly when the pin is squeezed between the bottom of the timber hole and the top of the steel connector inside.
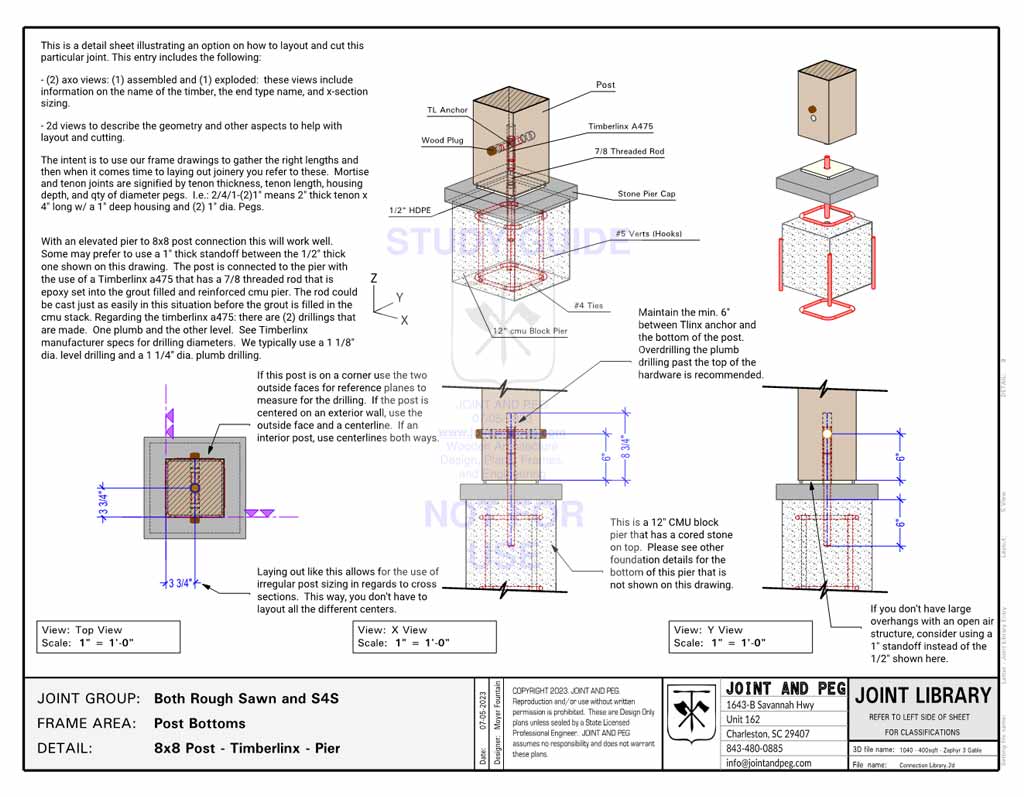
Posts – Post Bottom Timberlinx A475 – CMU Pier
With an elevated pier to 8×8 post connection this will work well. Some may prefer to use a 1″ thick standoff instead of the 1/2″ thick one shown on this drawing. The post is connected to the pier with the use of a Timberlinx a475 that has a 7/8 threaded rod that is epoxy set into the grout filled and reinforced cmu pier. The rod could be cast just as easily in this situation before the grout is filled in the CMU stack. Regarding the Timberlinx a475: there are (2) drillings that are made. One plumb and the other level. See Timberlinx manufacturer specs for drilling diameters. We typically use a 1 1/8″ dia. level drilling and a 1 1/4″ dia. plumb drilling. The timberlinx anchor is a go to with heavy timber to foundation connections.
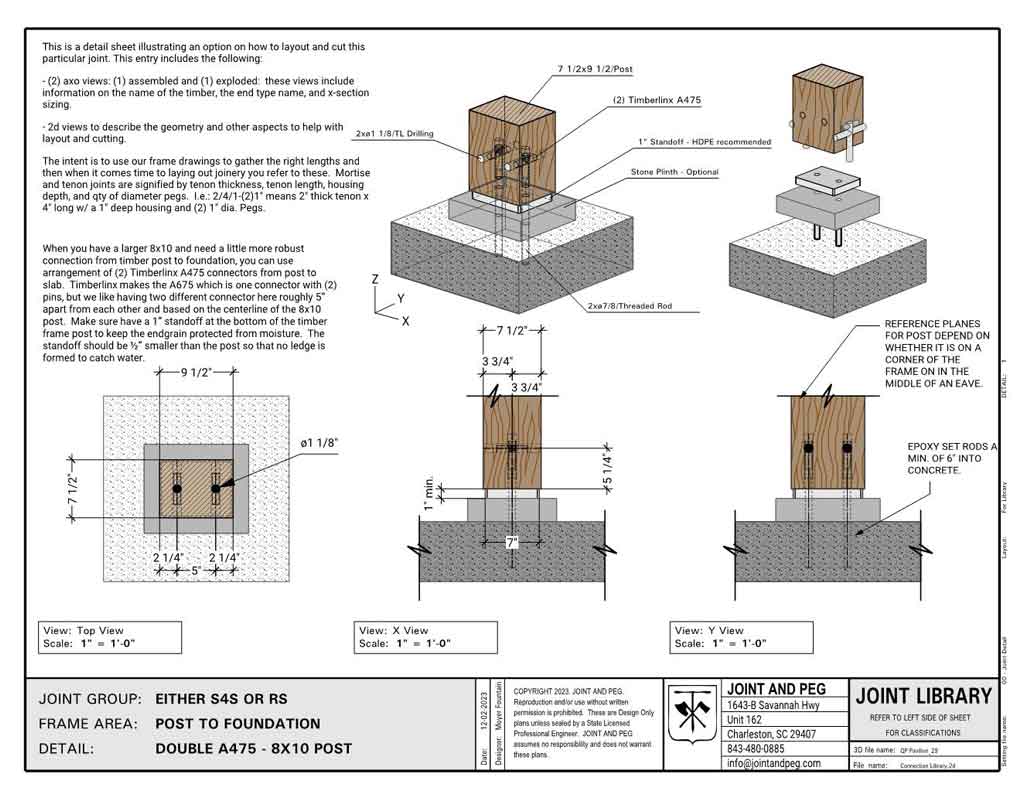
8×10 Post to Foundation – Double A475
When you have a larger 8×10 and need a little more robust connection from timber post to foundation, you can use an arrangement of (2) Timberlinx A475 connectors from post to slab. Timberlinx makes the A675 which is one connector with (2) pins, but we like having two different connectors here roughly 5” apart from each other and based on the centerline of the 8×10 post. Make sure have a 1” standoff at the bottom of the timber frame post to keep the end grain protected from moisture. The standoff should be ½” smaller than the post so that no ledge is formed to catch water.
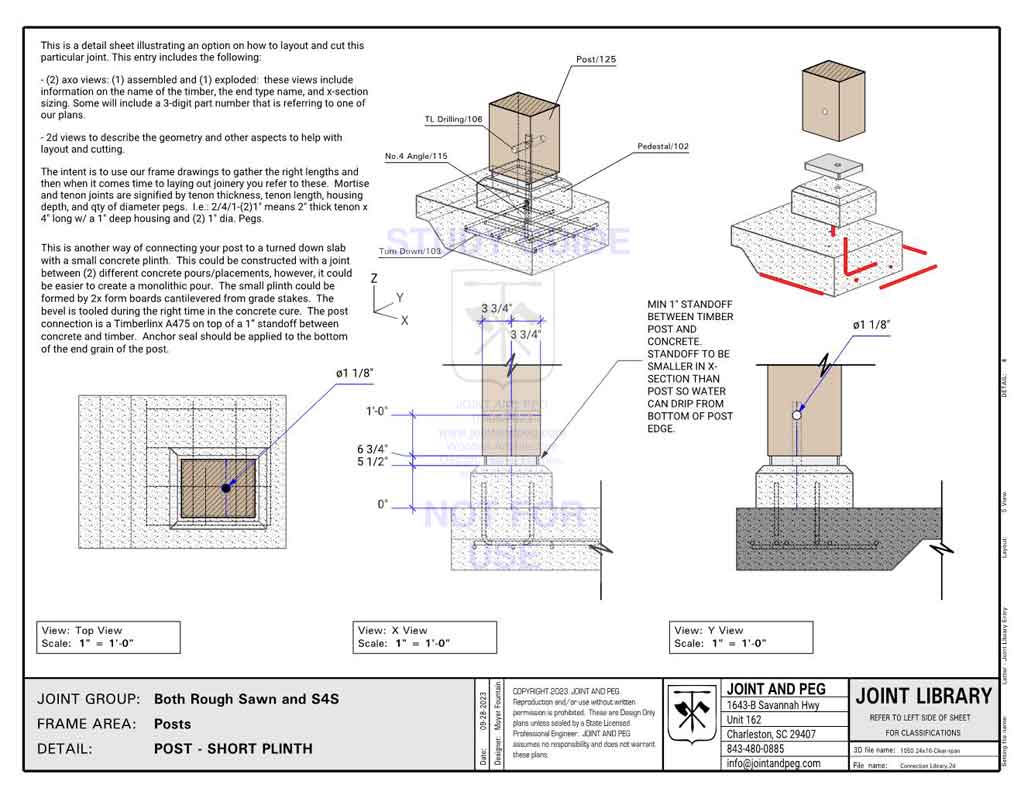
Post Bottom – Small Plinth
This is another way of connecting your post to a turned down slab with a small concrete plinth. One option is to construct this with a joint between (2) different concrete pours/placements. However, it could be easier to create a monolithic pour. Form the small plinth by using 2x form boards cantilevered from grade stakes. The bevel is tooled during the right time in the concrete cure. The post connection is a Timberlinx A475 on top of a 1” standoff between concrete and timber. Apply Anchor seal to the end grain on the bottom of the post.
Timber Frame Joint Details Catalog
Timber frame joint details on (34) individual letter size sheets. All drawings are printable and delivered instantly through a download link. Joint and Peg entries – Volume 1.
Post Tops
Posts – 8×8 Post Top to 6x Top Plate with Tie Beam
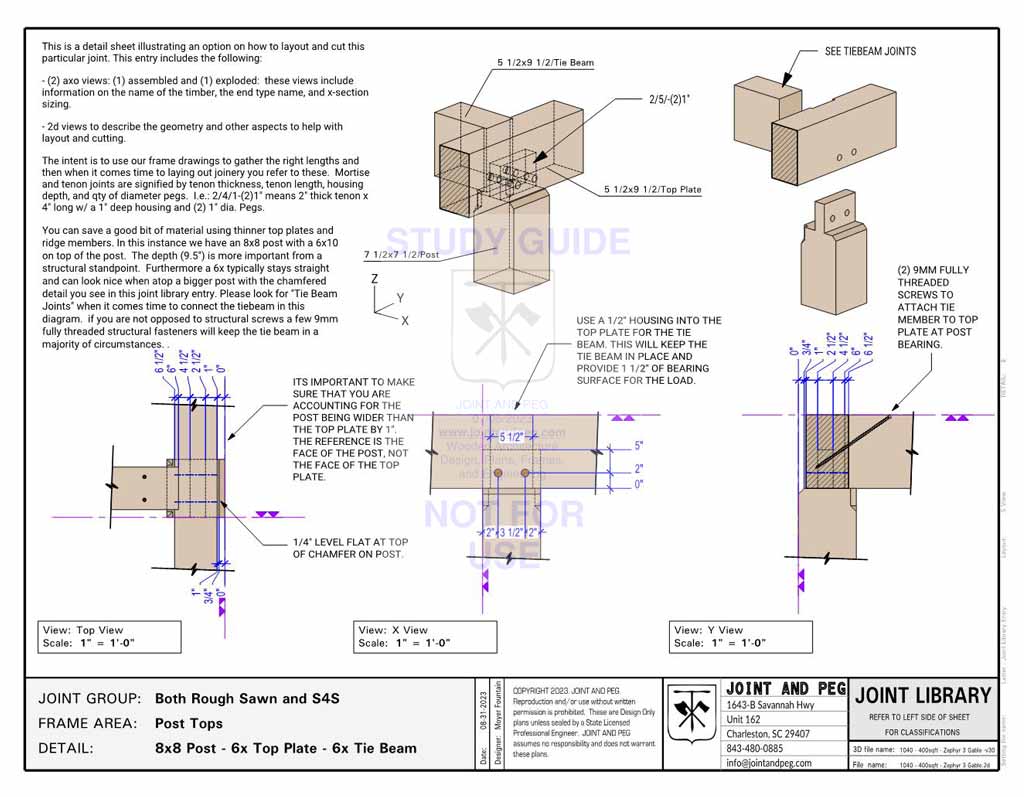
You can save a good bit of material using thinner top plates and ridge members. In this instance we have an 8×8 post with a 6×10 on top of the post. The depth (9.5″) is more important from a structural standpoint. Furthermore, a 6x typically stays straight and can look nice when atop a bigger post. Add the chamfer to the top of the post as shown.. Please look for “Tie Beam Joints” when it comes time to connect the tie beam in this diagram. If you are not opposed to structural screws, a few 9mm fully threaded structural fasteners will keep the tie beam in a majority of circumstances.
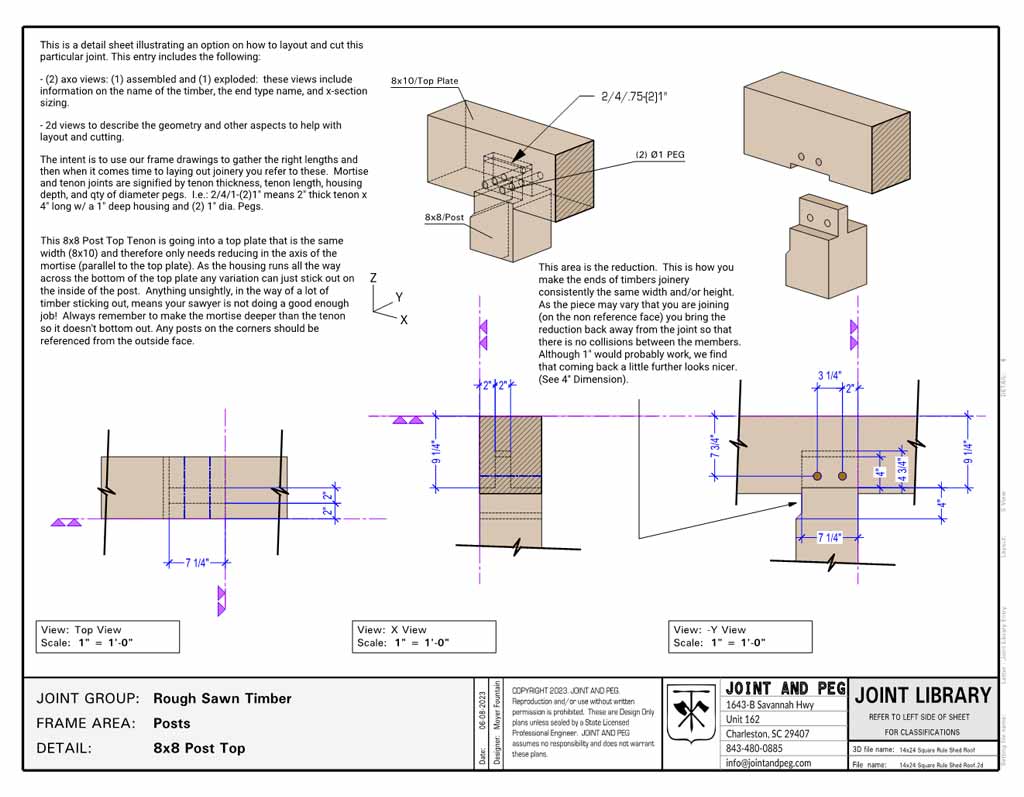
Rough Sawn – Posts – 8×8 Post Top to Top Plate
This 8×8 Post Top Tenon is going into a top plate that is the same width (8×10) and therefore only needs reducing in the axis of the mortise (parallel to the top plate). As the housing runs all the way across the bottom of the top plate any variation can just stick out on the inside of the post. Anything unsightly, in the way of a lot of timber sticking out, means your Sawyer is not doing a good enough job! Always remember to make the mortise deeper than the tenon so it doesn’t bottom out. Any posts on the corners should be referenced from the outside face.

Curious about peir foundations, and A frame designs